
I’d always wanted to hike the Kepler track. Famous for the annual ultra-marathon, it was something on the kick-the-bucket list. As I found, it was difficult to do at the last minute. Hiking (‘tramping’ in local vernacular) is VERY popular during the weather window between October and May – when mountain trails are reasonably free of ice and snow.
While the Kepler Track can be challenging physically, the main challenge, as with a lot of these sort of hikes, is finding a bed in hut for the 3 or 4 consecutive nights you are out in the wilderness. Bookings open around June and fill up about 3 seconds later for most Kepler Track huts. There are pros and cons of hiking huts, but the biggest con is the need for a fixed itinerary and having to book so far in advance.
As was the experience in Europe for the Tour Du Mont Blanc, camping as an alternative option provides a sense of freedom with no fixed itinerary. For those that don’t like to plan their adventures 6 months in advance, it allows access to the wilderness if you decide to go relatively last minute.
So, if you find yourself in the same position, I hope you find this comprehensive guide to camping the Kepler track (and last minute planning options) useful To make life easier, jump to the section that most interests you.
Contents
- The camping conundrum – read this first!
- Getting to and from the Kepler Track
- Kepler Track History
- Kepler Track Highlights
- Kepler Track Camping sites
- Campsite bookings
- Kepler Track Online Map & GPX file
- Camping equipment and packing list
- Before and After the Kepler Track
The camping conundrum – read this first!
Camping versus staying in huts does lead to a very different experience. On the plus side, camping provides an element of freedom, arguably a better connection with nature, not having to book too far in advance, and avoids the claustrophobia and noise associated with huts (aka snoring!).
On the down side, you have to carry more stuff, it can be slower and there is a bit of setup each night and pack up each morning. And, it could be a bit isolating if travelling alone.
The biggest logistics obstacle to overcome on the Kepler track is Luxmore Hut. This hut is hugely popular and is first to book out. It is used for overnight hikers from Te Anau along with those doing the entire loop. There is no official camping so if you cannot get a bed in the hut it can derail your entire adventure. So having been there, done that, these are your viable options.
Option 1: Book Luxmore Hut – this may sound counter to this entire guide, but really it is the best option. Good views, good facilities, well positioned, you can’t beat it really if you can secure a bed. Given the weather can turn quickly it is also the safest given the exposed position. If you don’t book early, beds can come available so keep checking the DOC Booking site right up until the day of arrival (with a backup plan). If there is a group of you, try individual bookings as you will have more chance on picking up any cancellations that way. This is also the highly preferred option by the New Zealand Department of Conservation (DOC), in order to preserve the fragile ecosystem around Mount Luxmore.
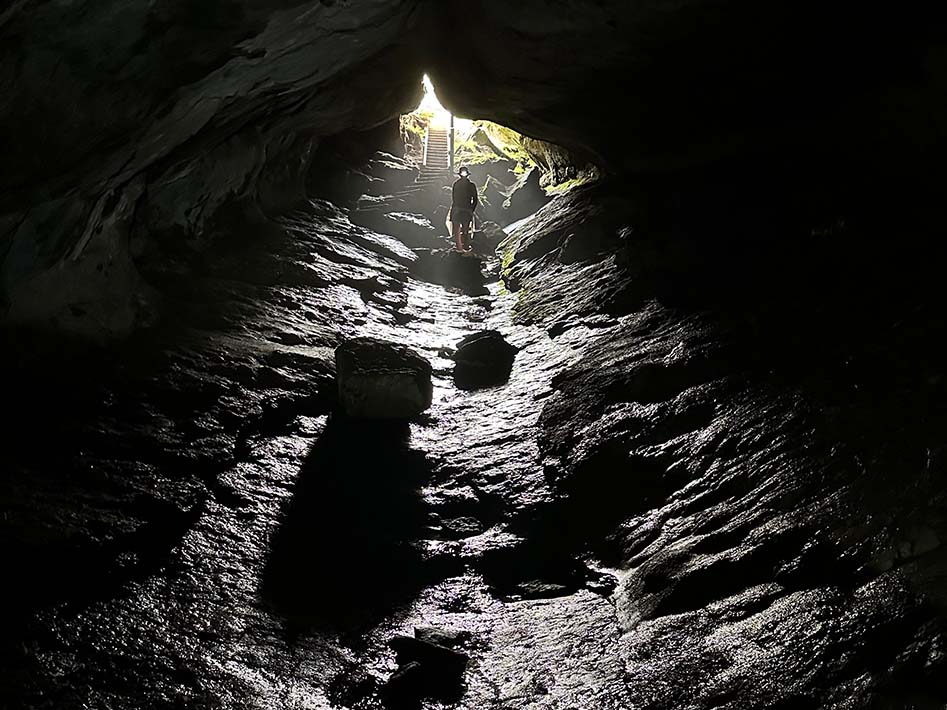
Option 2: Freedom Camp (read carefully) – The 10 ‘Great Walks’ in New Zealand, which includes the Kepler track, have very specific rules around freedom camping. Fines of up to $500 apply for breaching these rules. There is no camping within 500m either side of a Great Walks track. So its ‘500m or $500!’. Now, around Luxmore Hut there a very few suitable places to camp. It is a steep gradient, the ground is rocky with large tight clumps of alpine grass. There are obviously no facilities or water, so you’ll need to bring extra water and ‘leave no trace’. Also note, the trail to Luxmore cave is classed as a ‘Great Walks Track’ So you’ll need to go 500m beyond this.
The other factor to consider is the elements. You are in an exposed position above the tree line at around 1400m. Strong winds, ice, snow and rain are common. So you would need a four seasons tent, have the right gear and have the ability to navigate back to the track in an emergency.
In our experience, having freedom camped in quite a number of locations, this is likely one occasion where the hut is your best option. Mostly because it’s likely the best mountain hiking hut you’ll ever stay in! So book Luxmore hut as soon as you decide to do the Kepler track.
Option 3: Skip Luxmore completely – This is easier said than done. You ‘could’ camp in Brod Bay, then hike up past Luxmore Hut and up over Mount Luxmore down to Iris Burn campground in one day. Still, this would be 23km in distance with about 1400m elevation gain. Plus you’d be rushing past most of the Kepler Track highlights in one day. However, the days are long in summer (sun sets about 9:30pm) so it could be done. Going clockwise from Iris Burn to Brod Bay you would have the same distance (23km), slightly less ascending, but more descending.
Getting to and From the Kepler Track
Many of the other Great Walks in New Zealand, such as the Milford Track and Routeburn track, are point to point. One of the reasons we chose the Kepler Track was it is a loop. So this makes logistics a bit easier in this remote corner of the world.
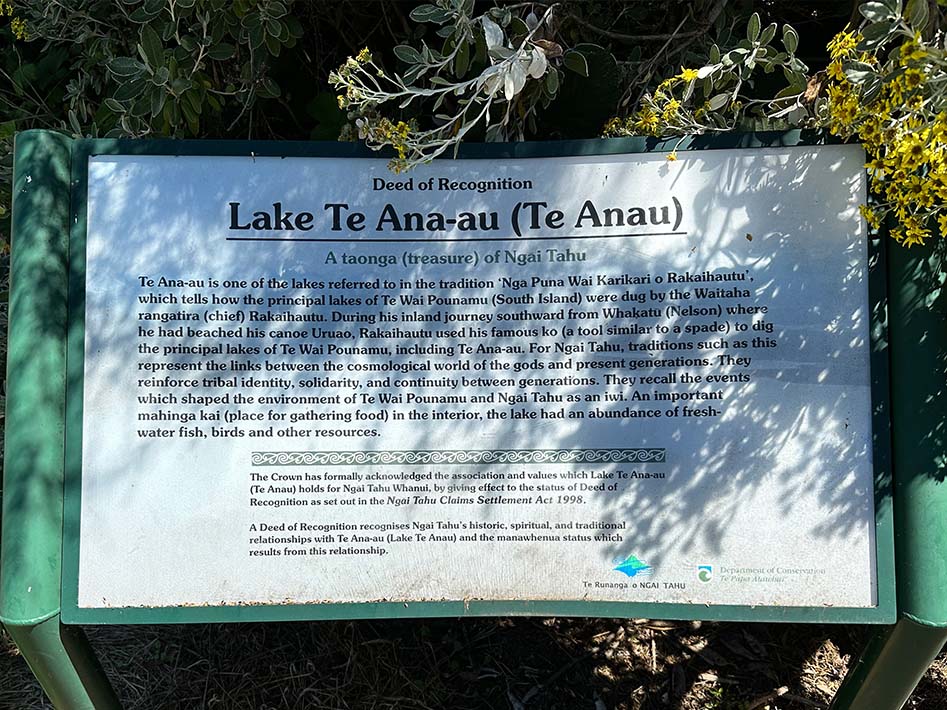
The closest town to the Kepler Track is Te Anau. A small town on the banks of beautiful Lake Te Anau. It is worth spending a night here either side of the hike if you can manage it. It also allows a trip to Milford Sound before or after the hike. A few different shuttle buses run to and from Te Anau from Queenstown. We used Tracknet which was reasonably priced and reliable. It was about $110NZD per person return.
If you didn’t want to stay in Te Anau, the same shuttle buses can take you directly to and from the trail head. Knowing all this, there are still a few options for your start and finish points.
Option 1 – Start and Finish in Te Anau
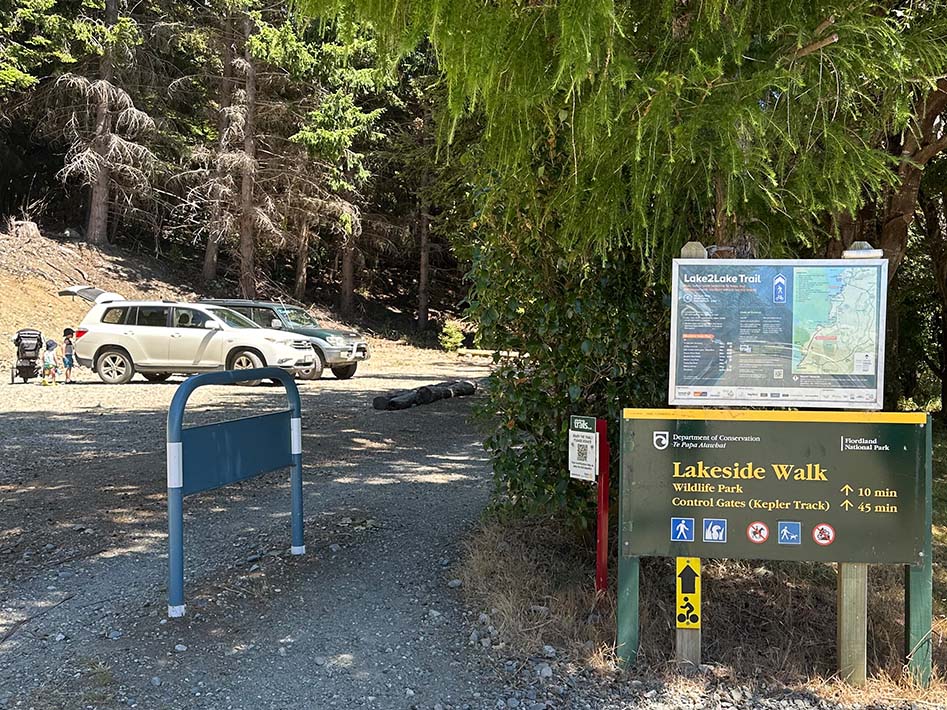
This was our choice. From the door of our hotel on the banks of Lake Te Anau we dropped some extra gear we didn’t need for the hike then followed the Lakeside Walk to the Control gates. This was a 5km gravel path. A bit exposed and was pretty hot the day we did it. If you can avoid this it would be worth it! Gluttons for punishment, we also walked back to our hotel once we had finished the hike. In the spirit of not wanting a fixed itinerary, this meant we didn’t need to co-ordinate with a shuttle bus on either end of the track.
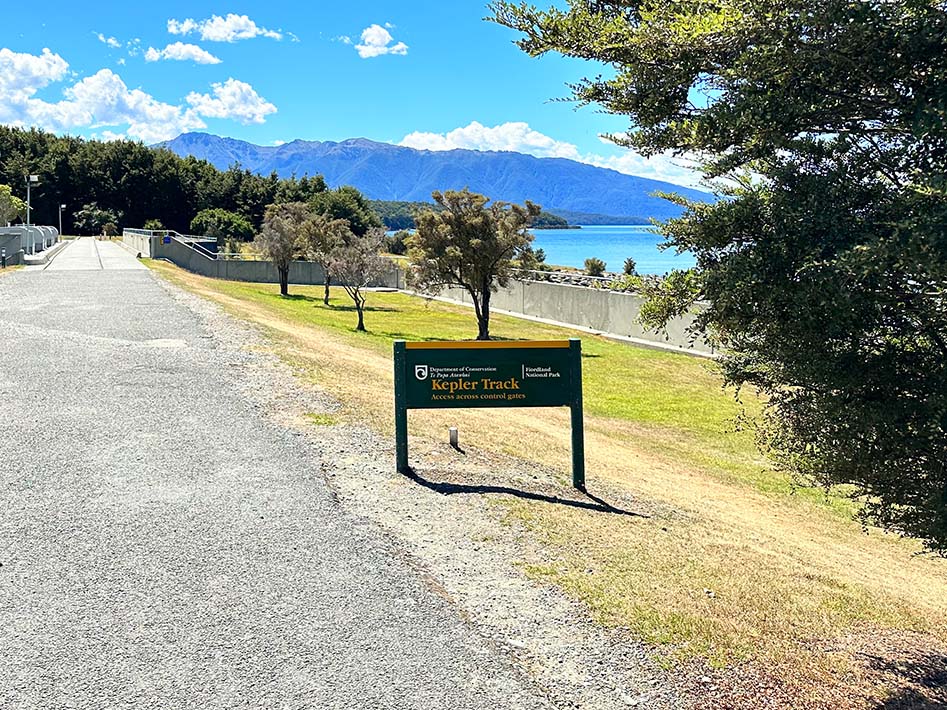
Option 2 – Start and Finish at Kepler Track Control Gates
This is the official start and finish point to complete the entire 60km track. It starts on the dam wall (control gates) separating Lake Te Anau from the Waiau river. Continue across the dam wall and continue straight ahead to Brod Bay (anti-clockwise route) or turn left to head on the clockwise route (Rainbow Beach, Moturau Hut). If you had a car or van you could leave it here pretty safely whilst you are on the track.
Option 3: Start and finish at Rainbow Beach
The other entrance to the Kepler Track is Rainbow Beach. This starts at a suspension bridge over the Waiau river. A bit more of a remote spot, so leaving a car may be a bit more risky, but likely OK. Probably best doing the clockwise route from here starting at Shallow Bay campsite.
Option 4 – Skip the 9km section between Control Gates and Rainbow Beach
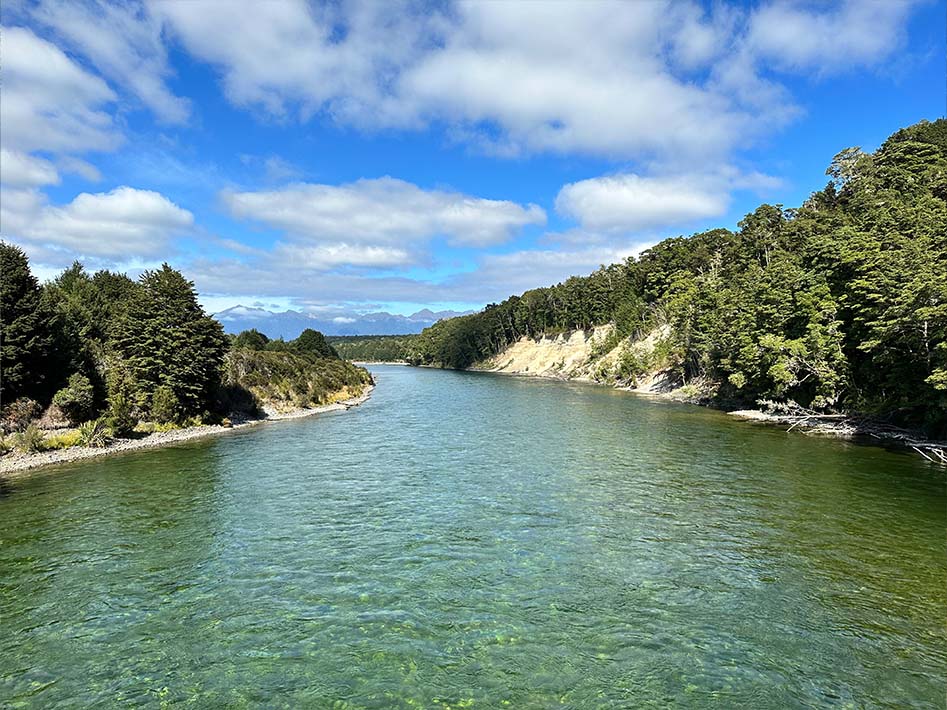
This will save 9km of the 60km track. Meaning you skip the section between Rainbow Beach and the Kepler Track control gates. This section follows the Waiau river and is pretty flat and shade covered. I found it quite nice following the fast flowing river but I can also see the temptation to tap out early. Likely best to arrange the transport beforehand for your drop off and pick up points with a shuttle company like Tracknet.
Kepler Track History
Te Anau means ‘cave of rain’ in Maori culture and accurately signifies the main feature of the climate on the Kepler track! The Kepler Track was opened in 1988 to celebrate the National Parks of New Zealand Centennial anniversary. Designed for hiking rather than following any particular ancient trade route (as per the Milford or Routeburn tracks) it was designed to take some of the traffic away from these popular tracks. Based on this it is a very well constructed and well maintained track.
The track is named for the mountain range it loops around which was named after a 17th Century astronomer Johannes Kepler. The Kepler Track ultra-marathon has been held on the track every year since the track opened and the winners complete the entire 60km course in about 4 and a half hours. So these runners need no camping gear or hut bookings!
Kepler Track Highlights (and lowlights)
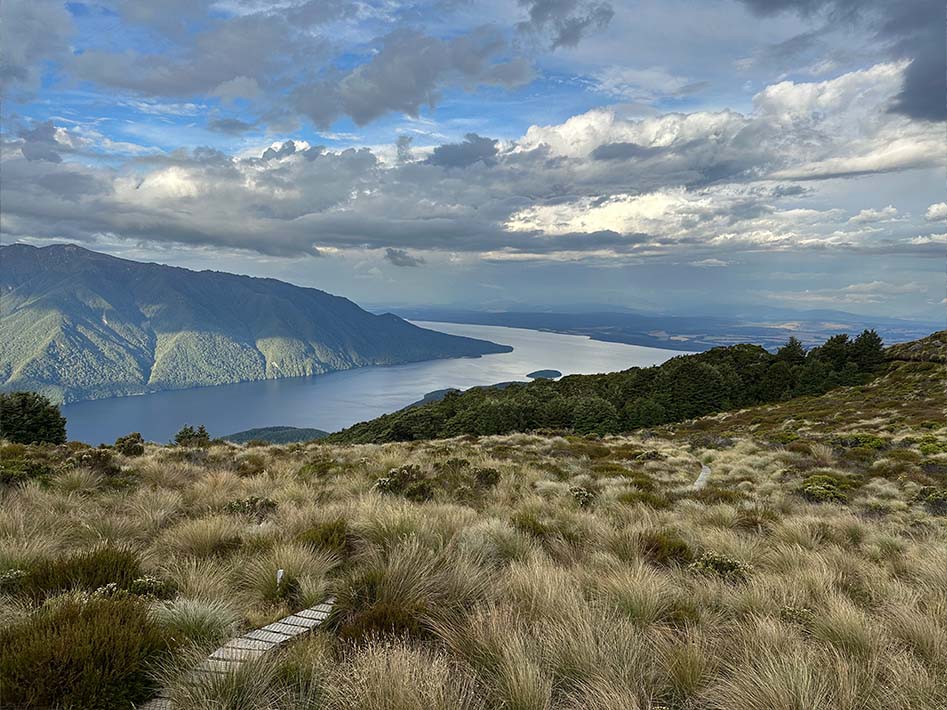
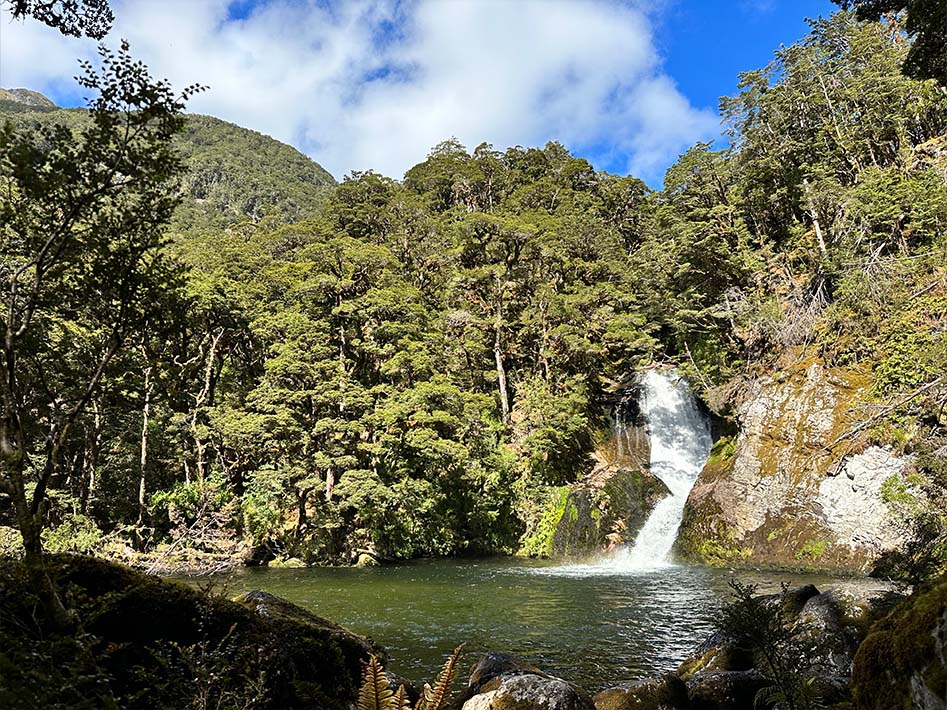
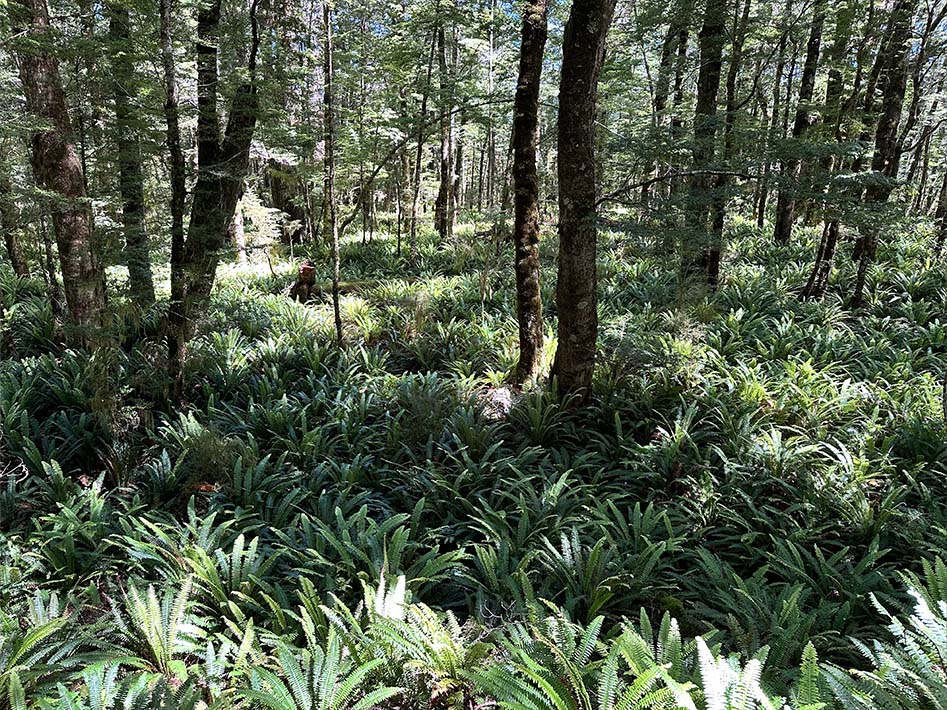
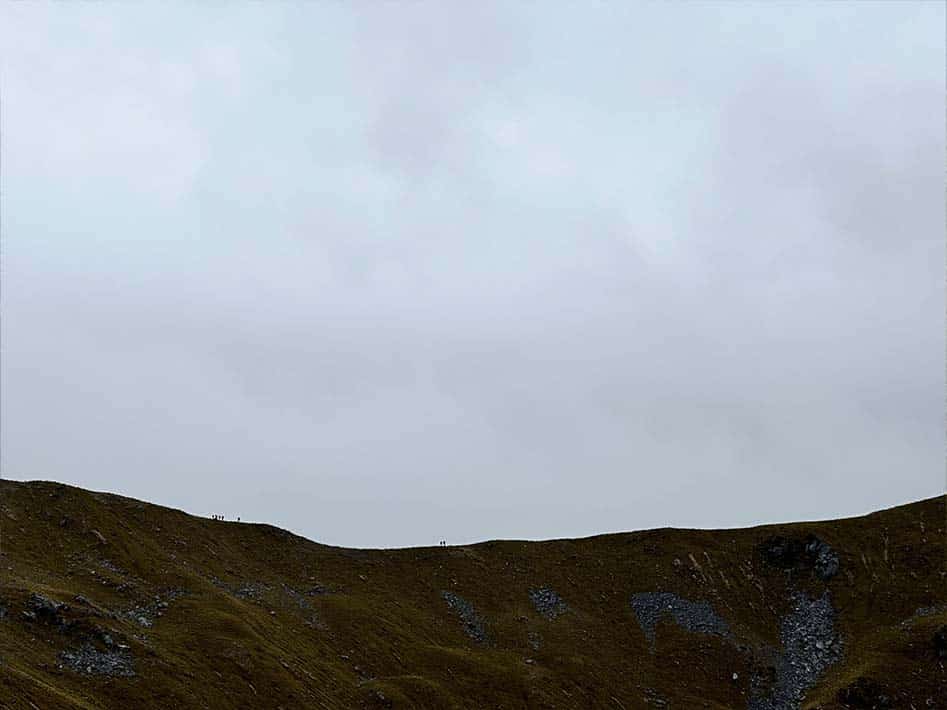
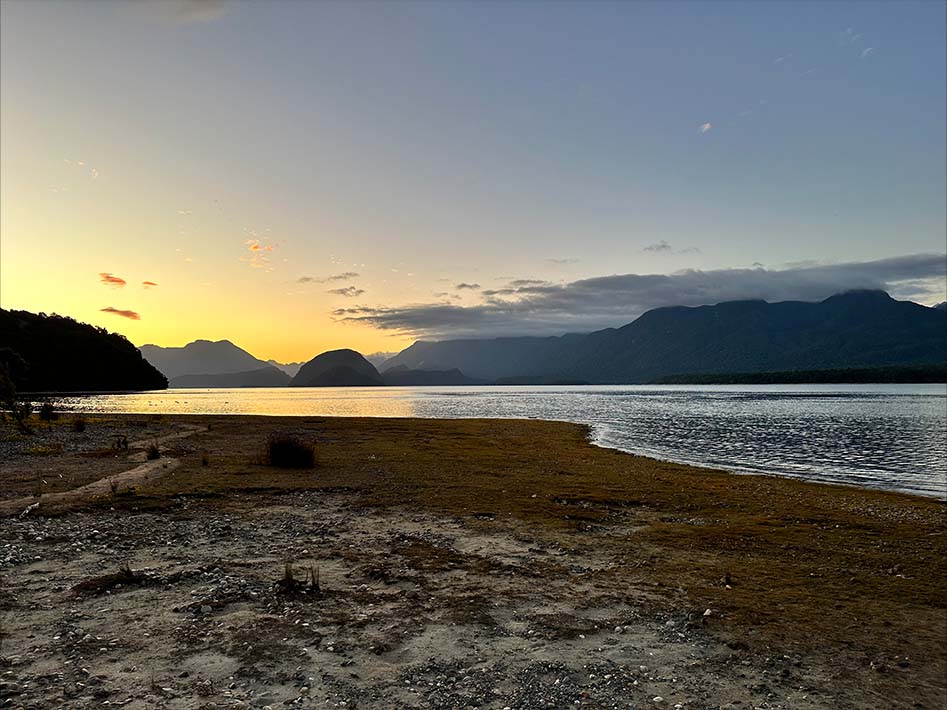
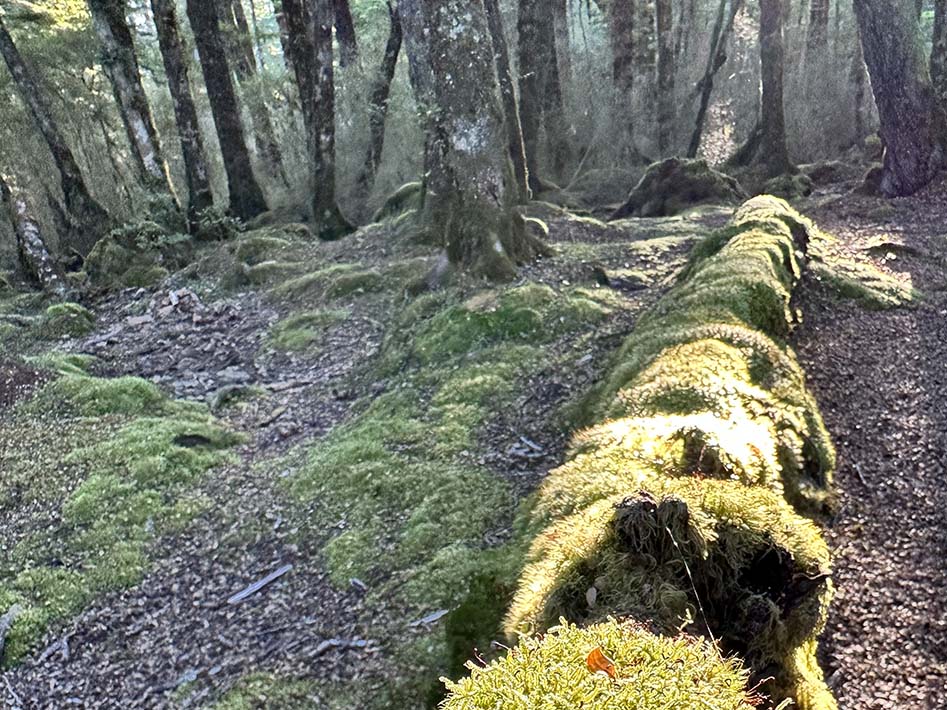
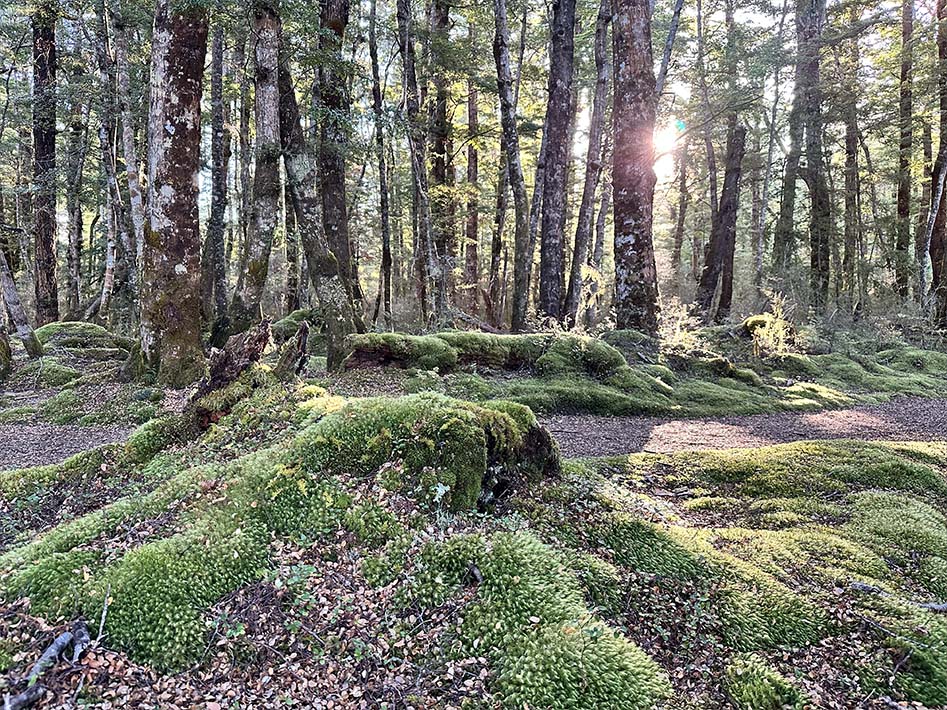
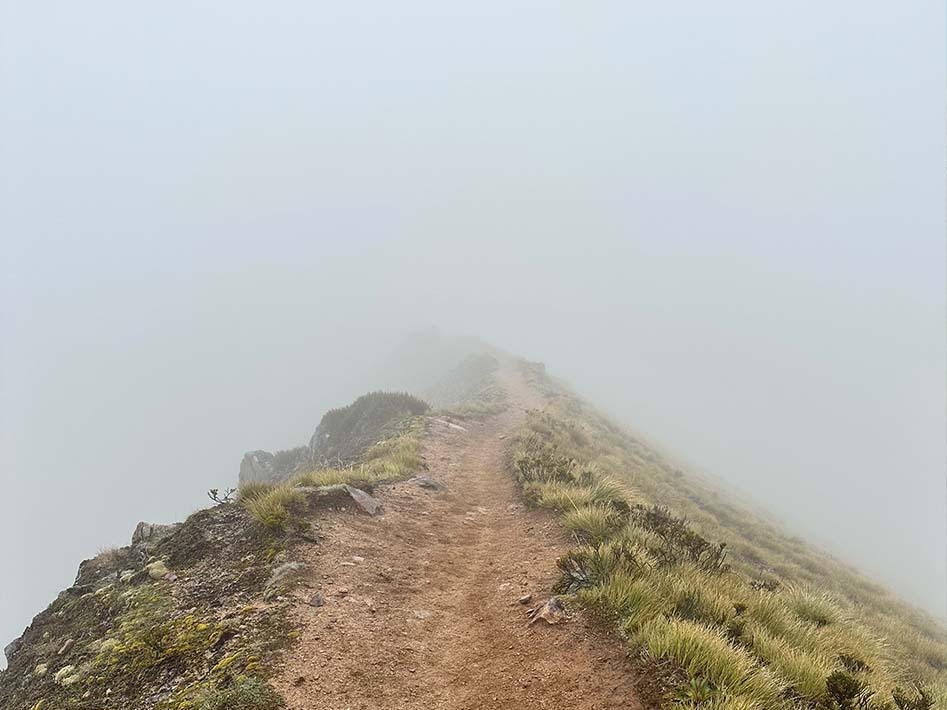
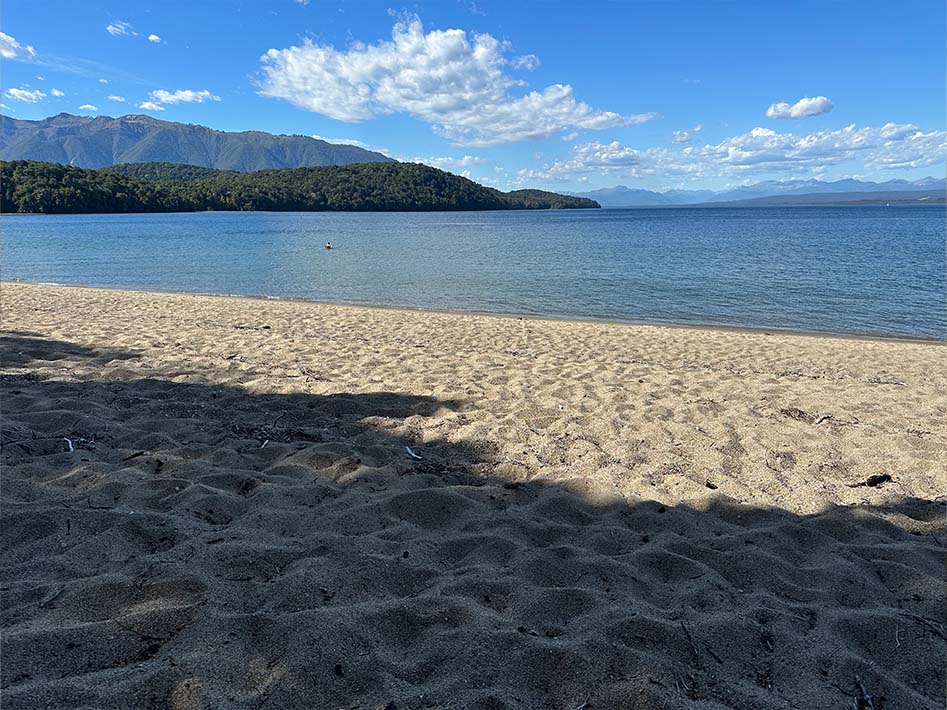
The views are likely what draws most people to the Kepler track. This includes the untouched rainforest, the lakes and rivers and the wide open mountain views along the ridge line between Luxmore Hut and Iris Burn. If the weather is right, swimming is possible at many points. Brod Bay beach is great, so too is the waterfall at Iris Burn and Shallow Bay beaches near Moturau hut and Shallow Bay campground. Even walking along the ridgeline in gale force winds, fog and sleet adds a certain amount of adventure!


With any experience there are some lowlights. These often get lost in the amazement of the overall experience. The main annoyance is the sand flies. These get reported on a lot. The main issue is they leave extremely itchy welts anywhere they manage to bite. The only tip is either keep moving or cover your skin well. Either in clothing or repellent, or both! Even then, your ‘temporary tattoo’ of the Kepler track will be a few large welts wherever they managed to latch on. Bring enough repellent for a small army – this will be both your deodorant, perfume and aftershave for this trip!
The Kea parrots are also good thieves, so leaving any gear around at Luxmore or Iris Burn will likely result in it being carried off by an inquisitive Kea. They also attempt to enter tents either via the entrance or they make their own ‘surprise’ entrance, so best to keep within site of your tent where possible!

Kepler Track Campsites
Going anti-clockwise, here is a brief summary of each campsite.
Brod Bay campsite
- From Te Anau: 9.89m (ascent: 60m; descent 54m)
- From Kepler Track control gates: 5.6km (ascent 40m; descent 40m)
- To Luxmore Hut: 8.2km (ascent 815m; descent 16m)
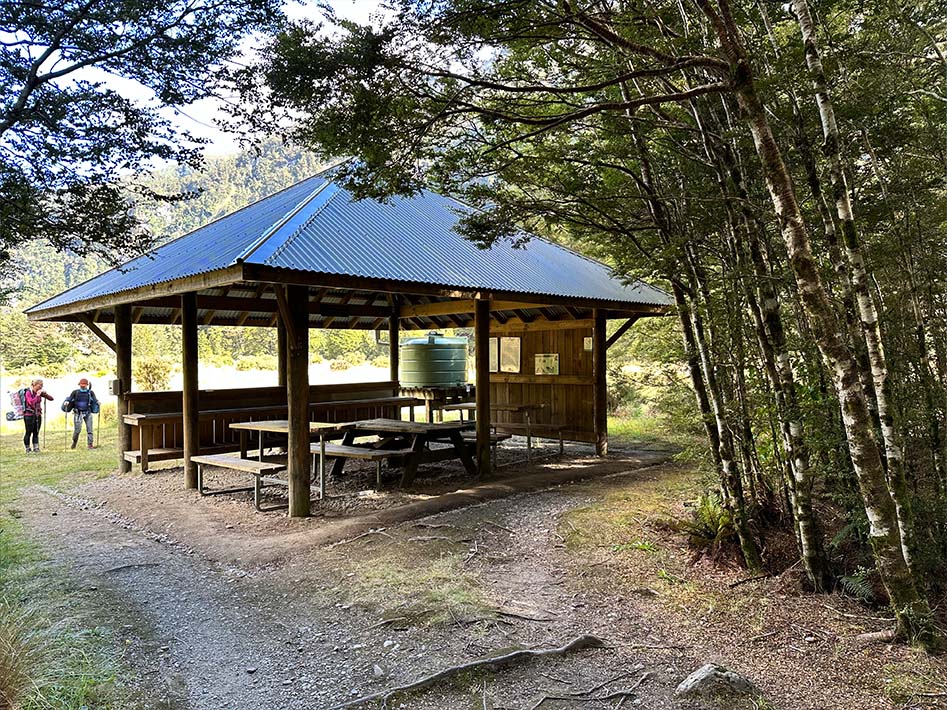
A great spot on the lake. Only 5km from the control gates so makes a good first night camp if you’ve come from Queenstown or started the hike later in the day. A sandy beach to easily get in for a swim and plenty of flat spots around in semi secluded spaces. There is an open shelter to cook in, a water tank and two pit toilets. Water is supposed to be boiled before drinking. We found getting water from the lake better and we used our SteriPen to steralise the water via UV light.
Campsites at Brod Bay are booked via the DOC Booking system. You need to book per person.
Luxmore Hut ‘Freedom camp‘
For the below distances add 2km if you venture into a freedom camp
- From Brod Bay: 8.2km (ascent 815m; descent 16m)
- To Iris Burn campsite: 15.2km (ascent: 661m; descent: 1,267m)
As mentioned, no official camping ground here but anywhere more than 500m from the official trail it is permitted to camp. Challenge will be to find a flat spot. Try these co-ordinates (S 45°23.5899 E 167°36.7059) which takes you past the Luxmore Cave (you need to camp 500m from the caves as this is part of the official ‘Great Walks track). There are no facilities of course nor water but you could obtain water from the hut if absolutely necessary.
Again, camping on the side of a mountain in an exposed location can be a bit treacherous. Changeable conditions and wind, rain and snow could make it quite the experience. Important you have the right tent and gear and know what you are doing. Having a sense of where the hut is in case of emergency would be wise!

Iris Burn campground
- From Luxmore Hut: 15.2km (ascent: 661m; descent: 1,267m)
- To Shallow Bay campsite: 20km (ascent: 202m; descent: 447m)
Campsites at Iris Burn have two style of location, in a grassy field or in the forest. Like Brod Bay there is an open shelter for cooking, a water tank and two pit toilets. The campground is separated from the hut and signs make it clear that no use of hut facilities is to be done. That said, the hut managers are pretty friendly and offer campers the ability to store bags in the hut overnight to avoid attracting curious Kea’s.
It is a 20 minute walk to the waterfall or you can swim in the river running next to the campground. Iris burn sits at about 600m above sea level so can get cool in the evenings
Campsites at Brod Bay are booked via the DOC Booking system. You need to book per person.
Shallow Bay campground
- From Iris Burn: 20km (ascent: 202m; descent: 447m
- To Kepler track control gates: 15km (ascent: 200m; descent: 170m)
- To Te Anau: 19.57km (ascent: 216; descent: 197m)
This is technically a freedom camp and does not need to be booked or paid for. It is a great remote spot on the bank of Shallow Bay. It is across the bay from Moturoa hut about another 3km past the hut. So this is about a 20km, mostly downhill, hike from Iris Burn. It is about 1km from the main track and you follow the arrow markers until you come to a small ranger hut. There is a pit toilet here but no water tank. The bay has decent water but boiling/sterilising is still recommended.
No camping at Rainbow Beach or Kepler track control gate
Beware that there is no camping allowed at the two entrance points to the Kepler track at Rainbow Beach or Kepler Track control gates. Given this is close to the track it is within 500 meters from the track so off limits to camping and there is no campground at these locations.
Camping in Te Anau
There is a campground Te Anau Lakeview Kiwi Holiday Park & Motels near the lake about 4km from the Kepler Track control gates. This is where the Tracknet shuttle bus stops, so it could be a good option if you were camping for the entire time you were in the area. It would be about a 10-15 minute walk into town from here and about 45 minutes to the control gates.
Campsite Bookings
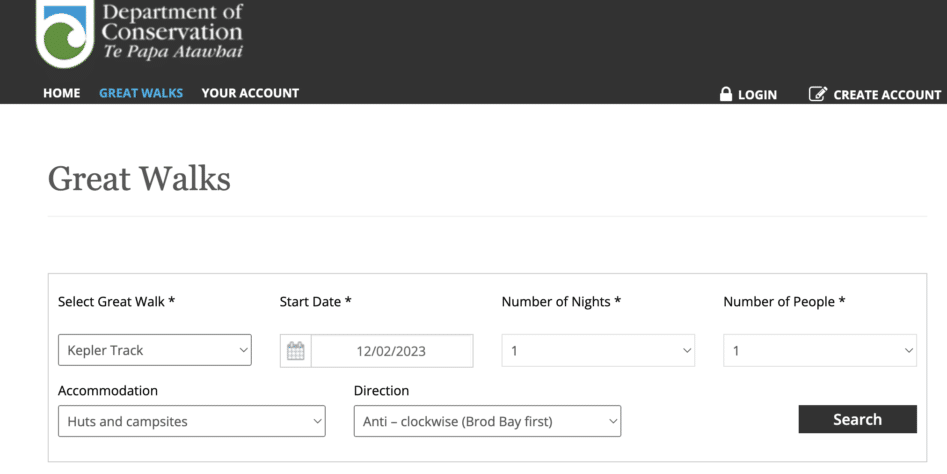
The two bookable campsites, Brod Bay and Iris Burn, are booked in the same online system that the huts are booked through. This is all via the Department of Conservation Great Walks booking system. It is a bit tricky if you are only camping. Basically you will likely have to make two separate bookings for each campsite as the system makes you book consecutive days. So when it asks for the number of nights, just choose 1 night and choose the Brod Bay campsite, then put through another 1 night booking for Iris Burn campsite leaving a day in between for your freedom camp. Then, keep trying to book the Luxmore Hut (as a single) up until you arrive.
Kepler track map and GPX file
The following Kepler track map has the campsites and huts listed along the track. Note the Forest Burn shelter and Hanging Valley shelter are only for day use only. These huts simply allows refuge from the weather if necessary and a great place to boil up some noodles for a much needed lunch rest stop between Iris Burn and Luxmore!
The camping spot marked near Luxmore hut is simply a recommended freedom camping location and has no facilities whatsoever. Please camp here at your own risk.
Kepler track GPX file
To create your own map or to load into your own device, please Download the Kepler Track GPX file.
Camping Equipment and Kepler track packing list
This list is based on our trip in summer (January 2023). There are many packing lists out there and each will vary to personal preference and how much you are willing to carry. For reference, we packed about 18-20 kilos each based on a 4 night, 5 day hike. There is nowhere to buy supplies en route apart from trading with other hikers. This list written for one person
Food
This was based around the average adult needing 8,700 kilojoules per day and factoring in the extra energy being burnt whilst hiking. So this list brought the average daily intake to 9,500 kilojoules
- Breakfast: 4x Backcountry Cuisine freeze dried porridge (675g when cooked)
- Coffee: Instant coffee, sugar, tube of sweetened condensed milk
- Lunch: 4 x 2-minute noodles, 4 x Clif Bars, 1 packet of beef jerky
- Snacks: 1 x packet of Bloks, 1 x packet of trail mix, 1 x packet of sweets/lollies
- Dinner: 4x Backcountry Cuisine freeze dried dinners (various dishes, 675g when cooked)
- Hydration: 1 tube (20 tablets) of Hydralite (electrolyte drink)
Camping gear
Listed here is the extra equipment required for camping only. See the equipment list for everything else you would need even if using the huts.
- 1 x 2-person tent (4 seasons MSR tent)
- Sleeping Mat (thermarest)
- Gas bottle (butane)
- Camping stove (MSR)
Equipment
- 70-litre backpack
- Hydration bladder (2-3 litres)
- Drink bottle (1 litre)
- Trekking poles
- Head torch plus spare batteries
- Battery pack (recharge phones, cameras, watch etc)
- Watch (Suunto Ambit Peak)
- Mobile phone/camera (signal available along a good portion of the track)
- Sleeping bag
- Toiletries (toothbrush, toothpaste, deodorant)
- Coffee Mug
- Steripen (water sterilser)
- Spoon and fork
- Knife (Leatherman)
- Zip lock bags
- Toilet paper (only needed if an emergency, toilets were well stocked)
- Garbage bag
Medical
- Suncream
- Antiseptic cream
- Insect repellant – DO NOT GO WITHOUT THIS!
- Panadol
- Ibuprofen
- 4 x blister pads
- 10 x band-aids/plasters
- Scissors
- 2 x emergency blankets
- Knee/ankle Bandage
Clothing
- Hiking boots
- 3 pairs socks
- Trekking pants
- Waterproof pants
- Thermal pants
- Lightweight shorts
- 3 pairs underwear
- Thermal top
- Long sleeve trekking shirt
- 2 x t-shirts
- Fleece
- Down jacket
- Rain jacket
- Gloves
- Neckscarf
- Beanie/Woolen hat
- Sunglasses
- Wide brim hat
Before and After the Kepler Track
Before
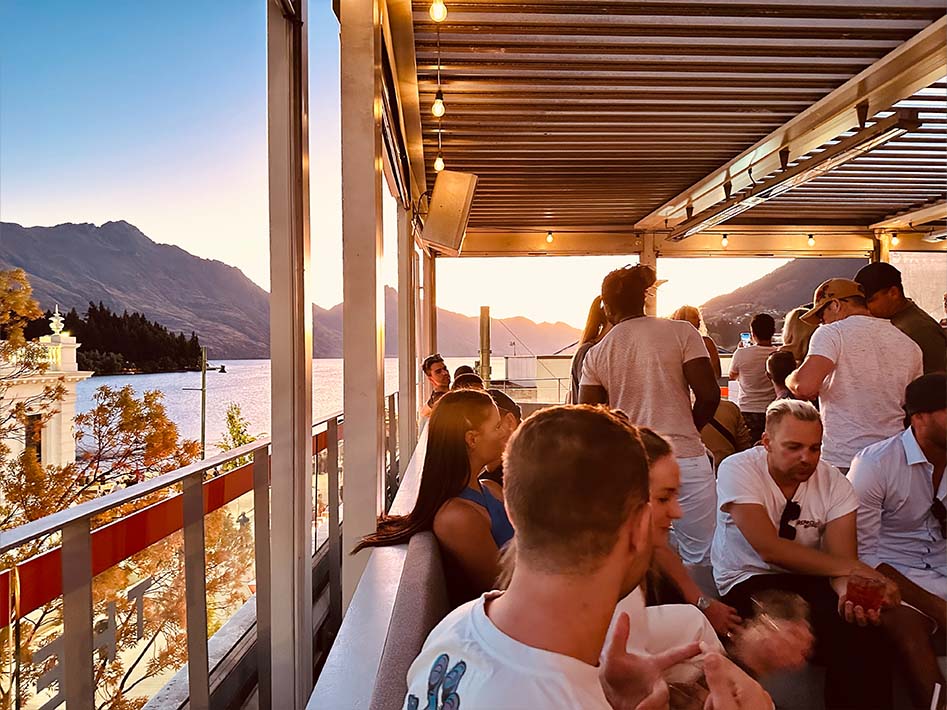
Queenstown is the most logical stop before the Kepler track. Having a day to gather last minute supplies is best in Queenstown. Te Anau has a few shops but might not have everything you need. If you are arriving from outside of New Zealand you will need to buy gas and matches in New Zealand. We bought all our food in Australia before arriving but there was plenty of places to buy freeze dried camping food in Queenstown and Te Anau.
Queenstown also has a good mix of entertainment, restaurants and bars should you want to party before your hike! Te Anau is a bit more laid back and a few bars and restaurants which close up early.
After
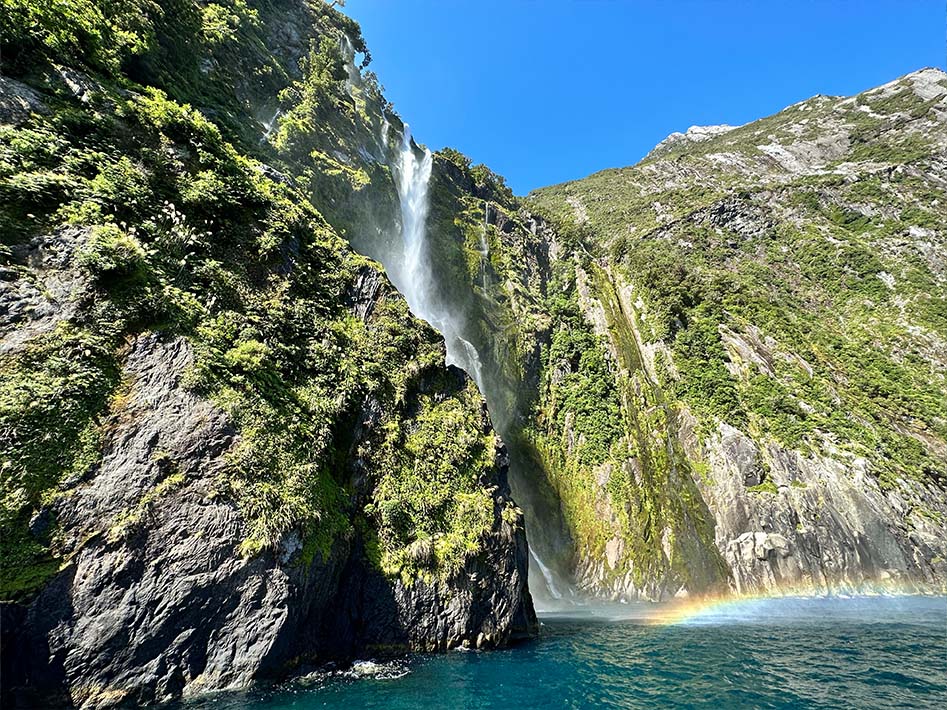
Milford Sound is about a 2 hour drive from Te Anau and the drive is about as scenic as Milford Sound itself. A 2 hour boat ride out into the sound starts from about $70. You’ll see cliff top waterfalls, sunbaking seals and experience a valley carved by an ancient glacier. Apart from Milford Sound if you are still feeling energetic, the Routeburn and Milford tracks start from just outside Te Anau. But those are for another day!
Really hope you enjoy your Kepler Track experience. Whether you camp or stay in huts (or even a bit of both) you’ll have an amazing time. Take your time and enjoy every moment in the wonderful wilderness of Fjordland!


About The Author
Warren
Ever since venturing out the back gate into the bush as a kid, I've had a curiosity to escape and explore as often as I could. It's fair to say that my curiosity has continued to grow instead of fade as the years go on. It eventually came time to turn a few scribbled notes into some legible stories and travel tips for anyone with a similar curiosity as me.